Do you want to add your site to Pinterest so that you can view reports on content you’ve Pinned?
All in One SEO makes this really easy so you can see how well your content does.
Here we’ll show you how to authenticate your site with Pinterest using the HTML tag method.
Adding Your Site to Pinterest
Prerequisites:
You’ll need to have an account with Pinterest, Google or Facebook.
If this is for your business, you may want to think about using a separate account for your business, rather than using your personal account.
To get started, you’ll need to sign into Pinterest (if you’re not already signed in).
If you don’t have an account, you can either sign up for one, or you can use your Facebook or Google account to log in.

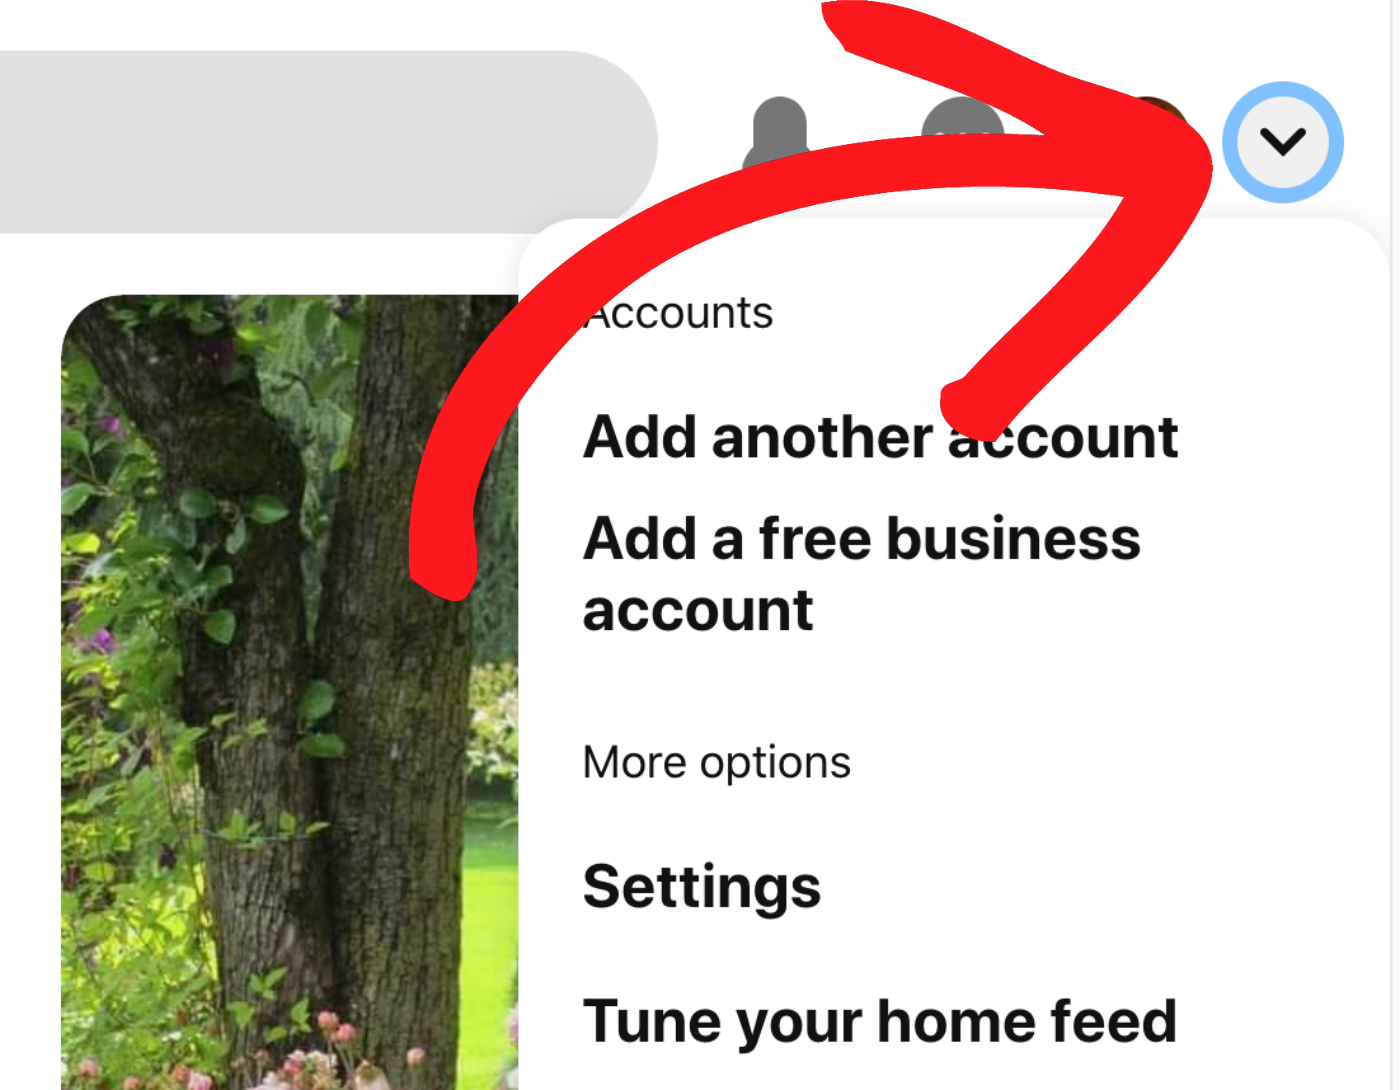
Once you’ve logged in, click on the down arrow in the top left corner of the screen to display a menu, and then click on Settings.
Next, click on Claim in the menu on the left hand side of the screen and you should see the Claim screen.
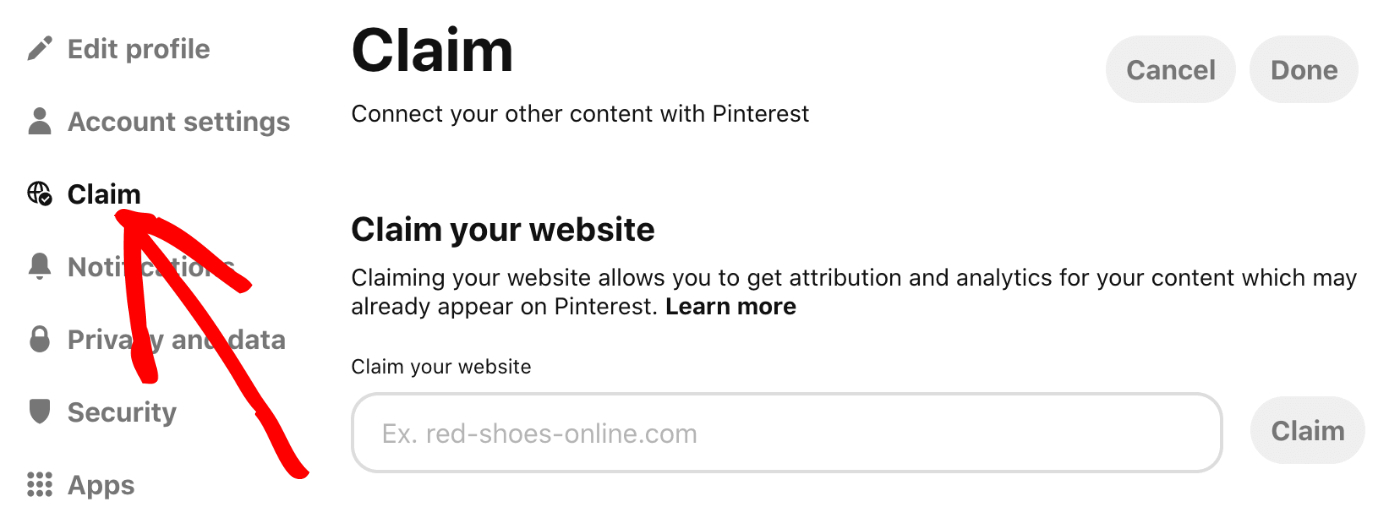
Enter the URL for your site in the box and click the Claim button. You do not need to enter the https:// part of your URL.

Next, you’ll see a screen that says Pick claim option, and you’ll see two options. Choose the Add HTML tag option.
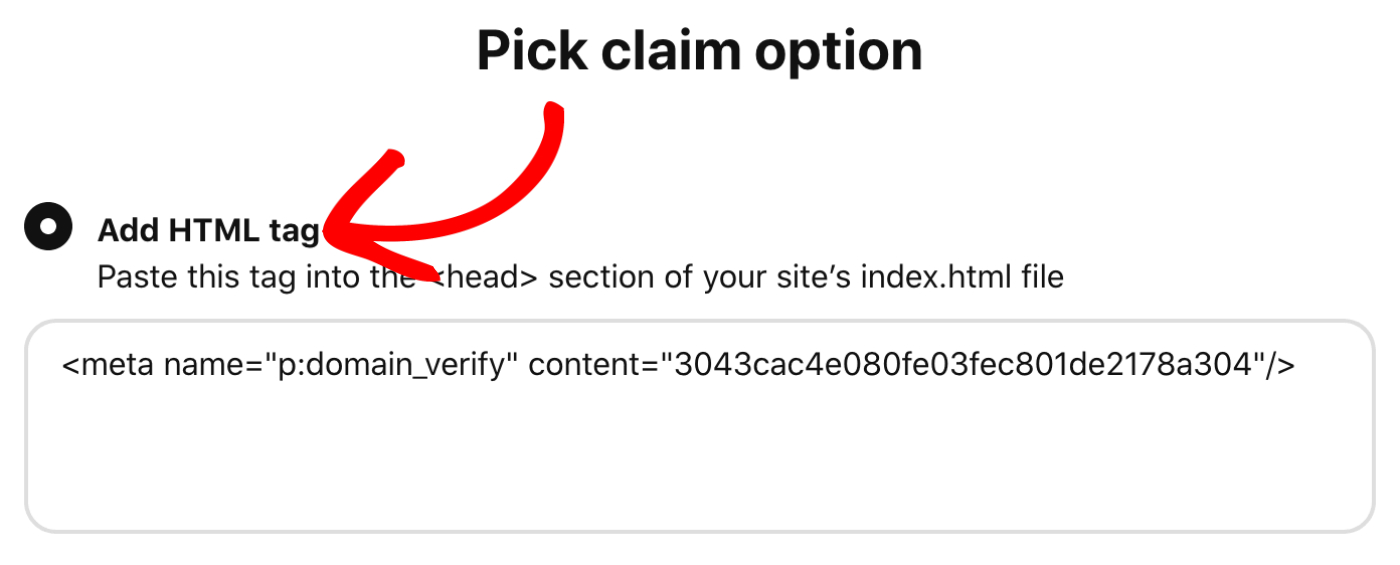
Select the code in the Add HTML tag box with your mouse, right click on the selected text and choose Copy.

Open a new browser window and log into your WordPress site. Click on General Settings in the All in One SEO menu and then click on the Webmaster Tools tab.
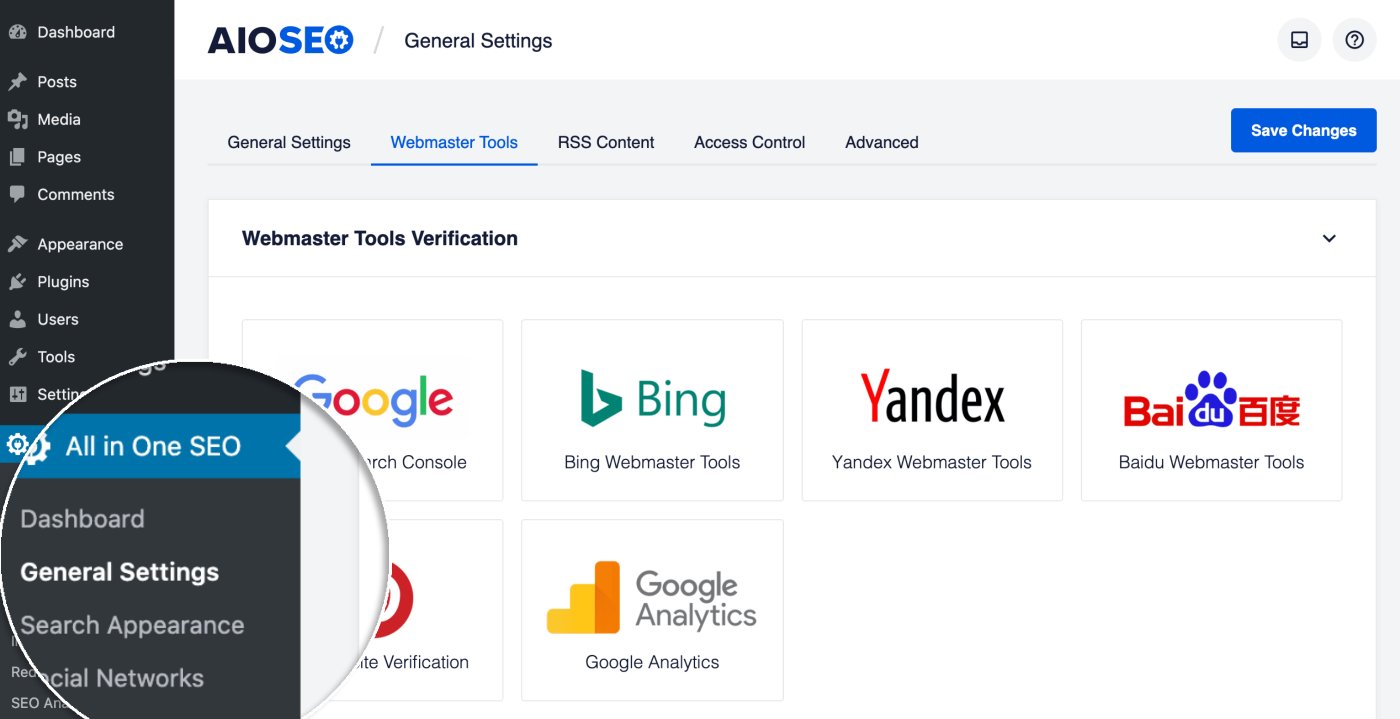
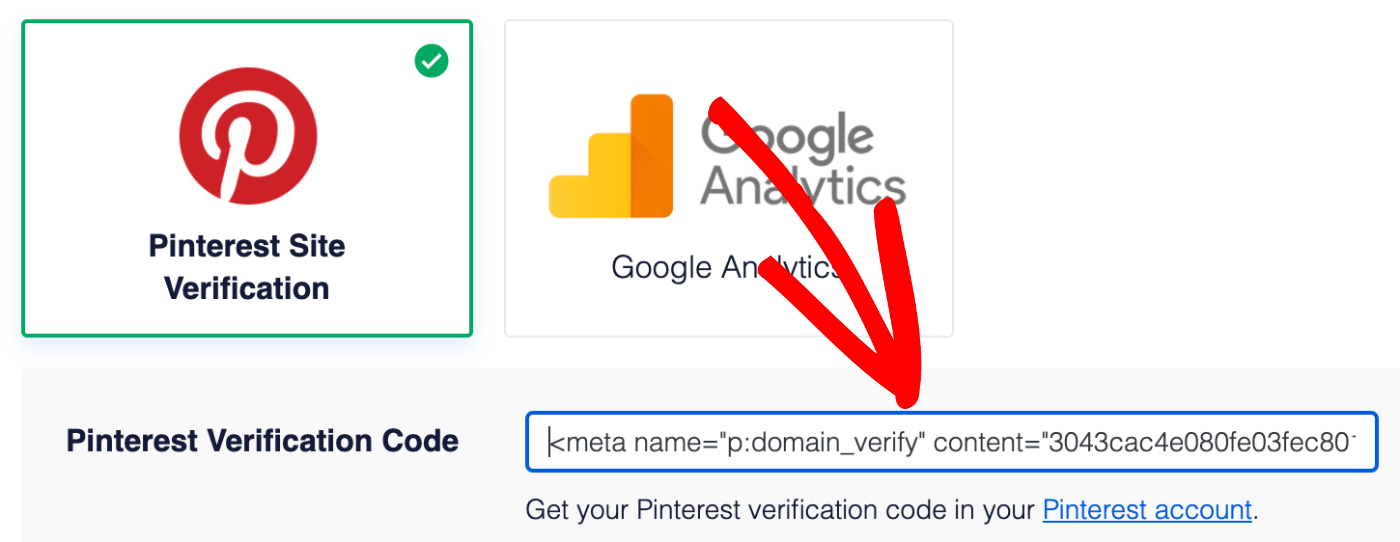
Now click on the Pinterest Site Verification block and paste the code you copied into the Pinterest Verification Code field.
Now all that’s left is to go back to Pinterest in your other browser window and click the Next button, and then click the Submit button on the Submit for review screen.

You should receive a notification once Pinterest has approved your request to verify your site.


